Van Equipment for Your Camper Self-Build in Plug & Modules
Get in the bus, hit the road, arrive, open the door, vacation ... and ... home on the go!
With our plug-and-camp system for easy DIY building and secure setup, you can design your camper creatively, just the way you like it.
#athomeinthebus #organiceyourvan
Mini + Micro Camper DIY System with Custom Modules
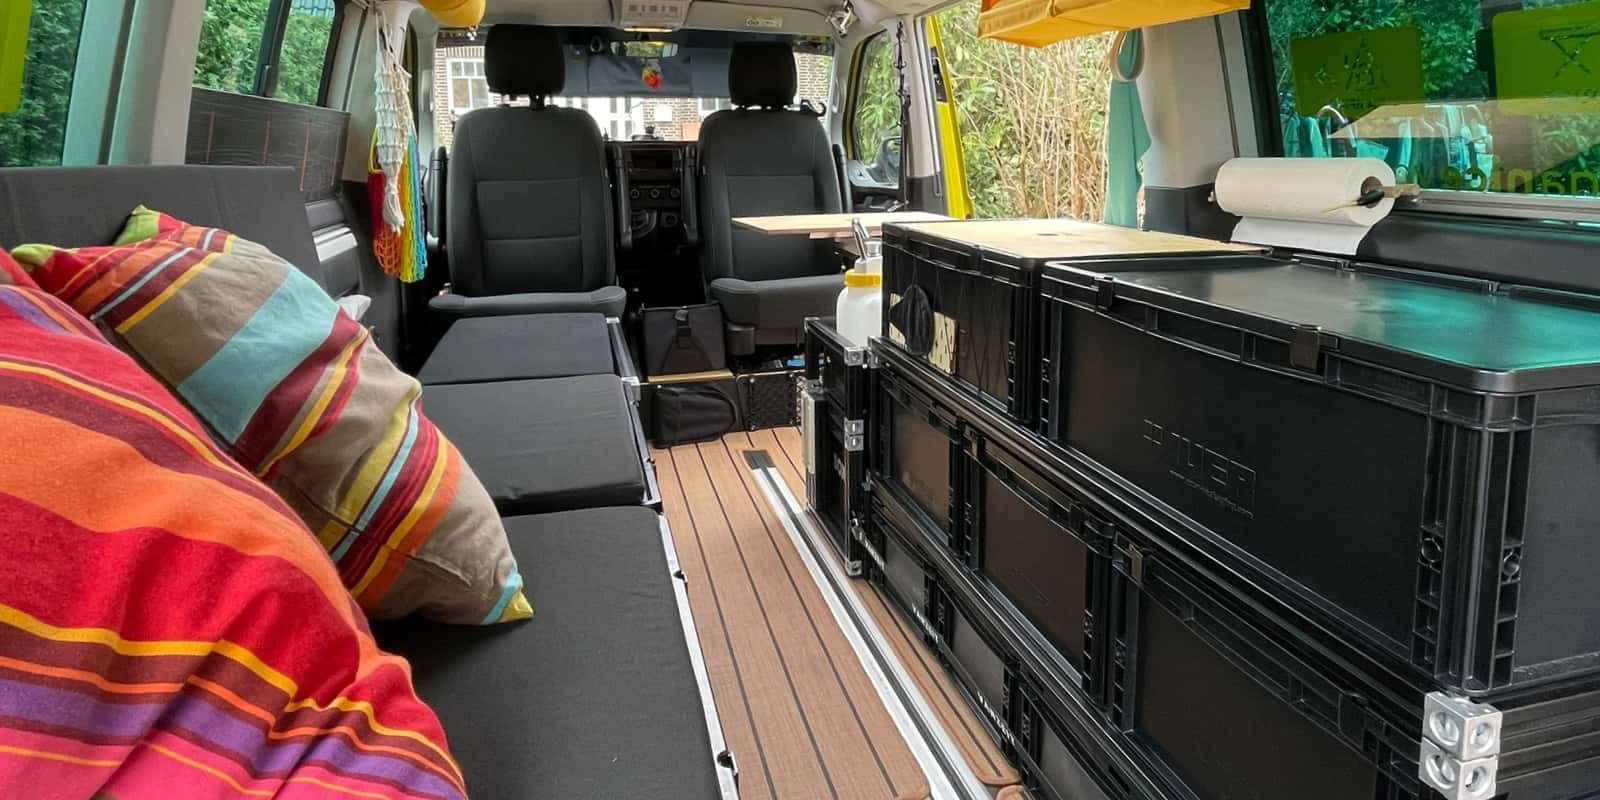
Our DIY system is leaseable, fully reversible, easy to assemble, and secure. We have developed all modules ourselves and use them year-round in our own VW California Beach.
You can find our setup and a description of the elements, along with the system’s benefits for your own camper, here.
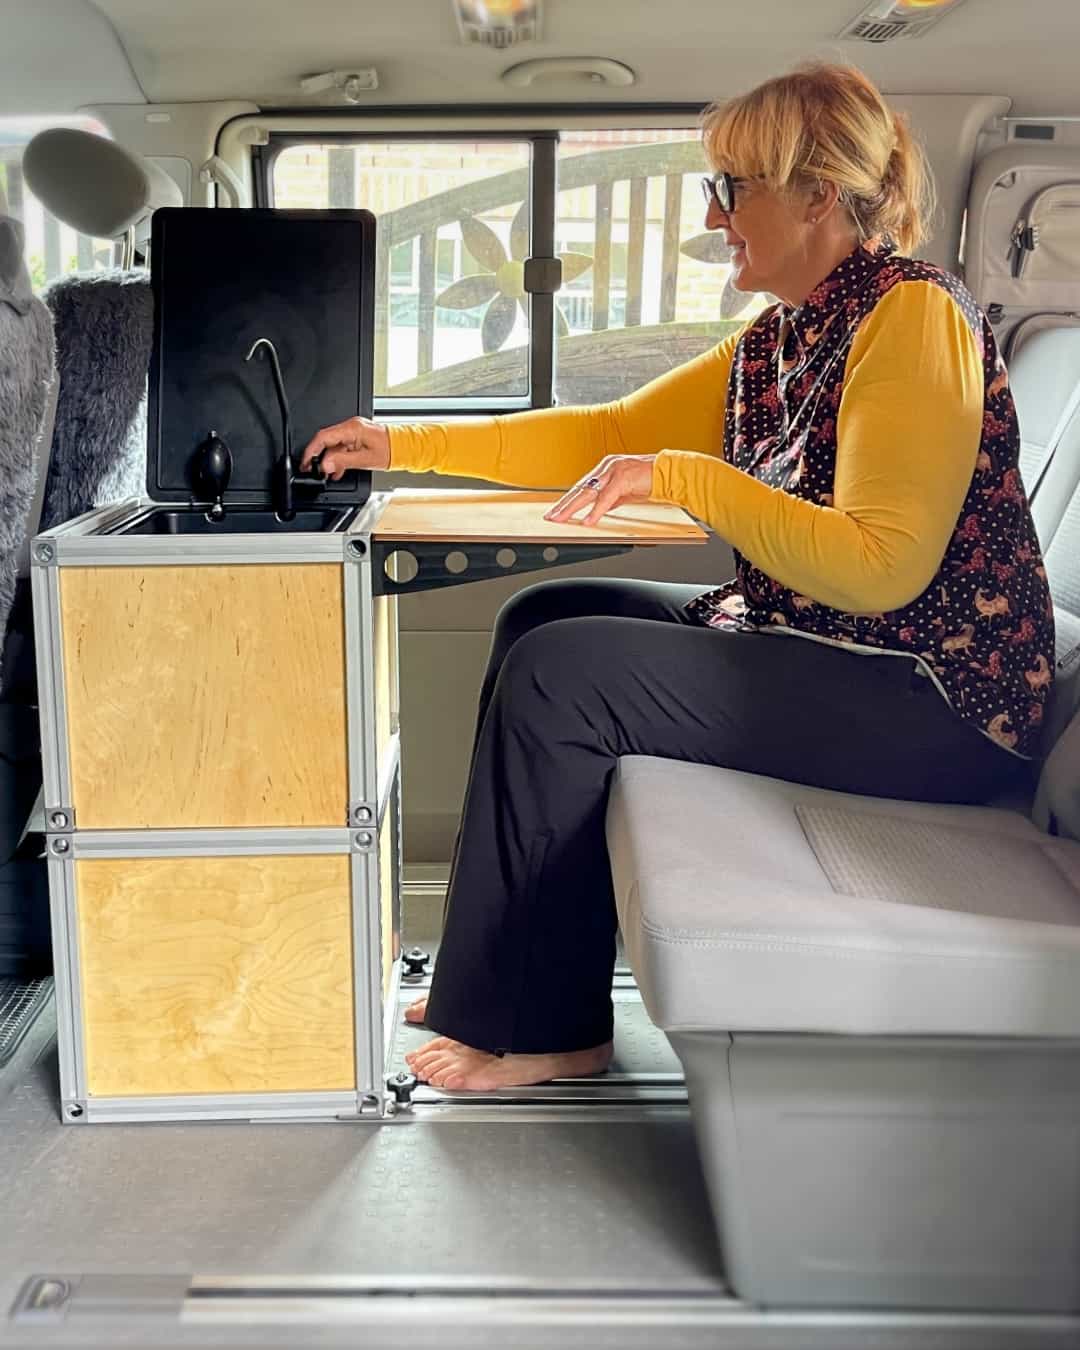
2-in-1 Camping Combo Modules
Separating toilet + stove, water + cool box, sink + storage box ... your choice in the easily pluggable camping combo module for indoor and outdoor use, incl. table.
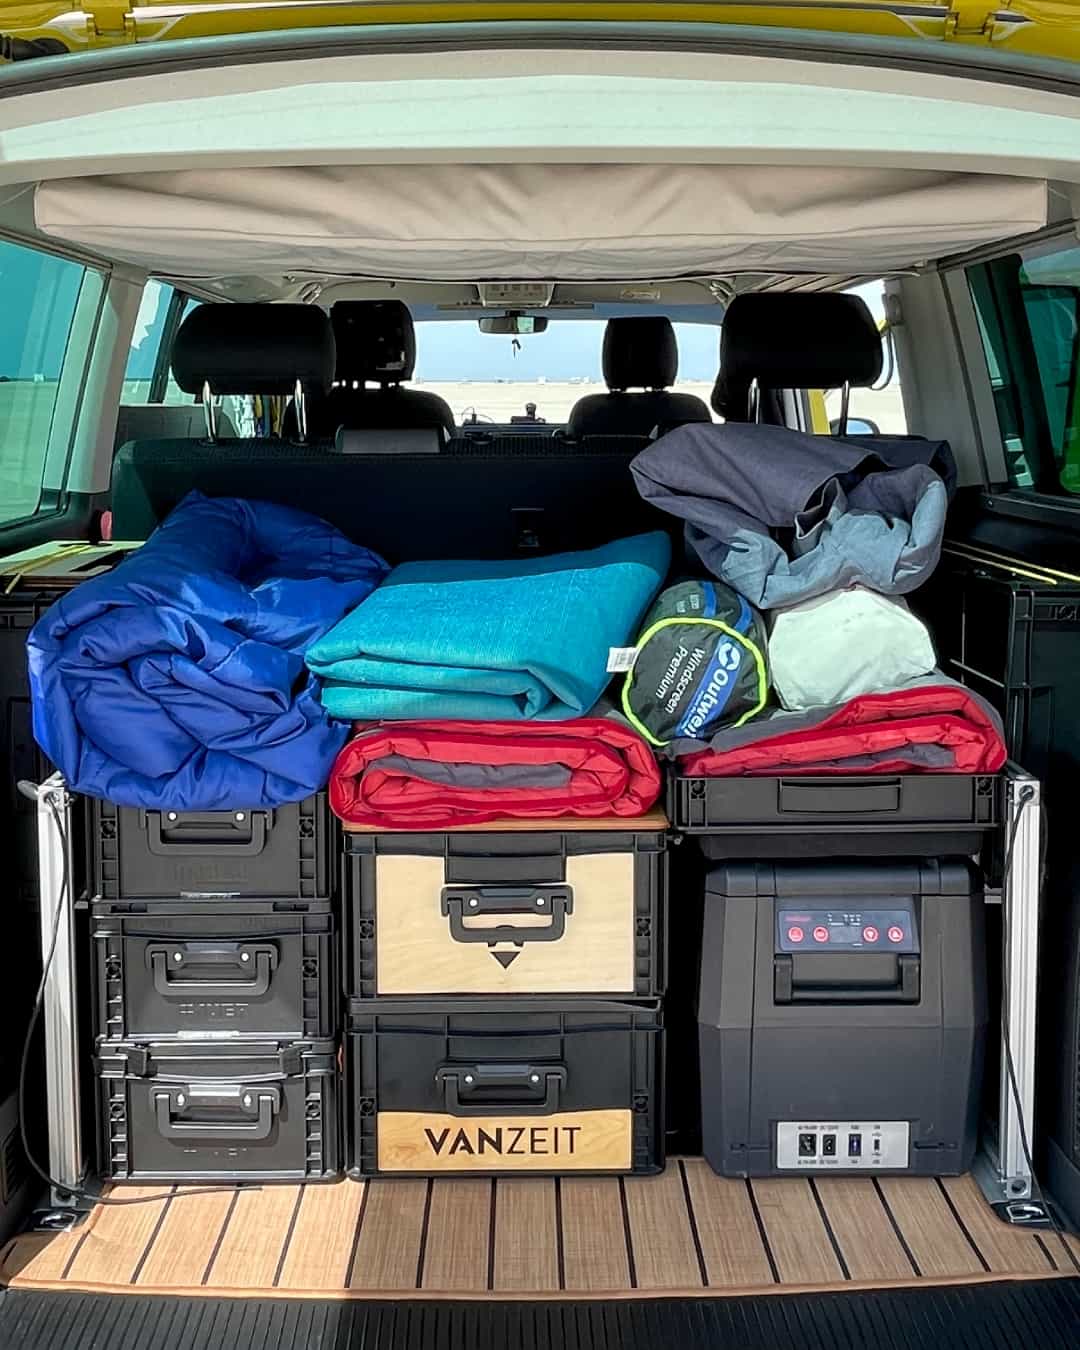
Camping Box System Base
Still running around your car in all kinds of weather to reach the trunk? Just access your rear storage at any time with ease.
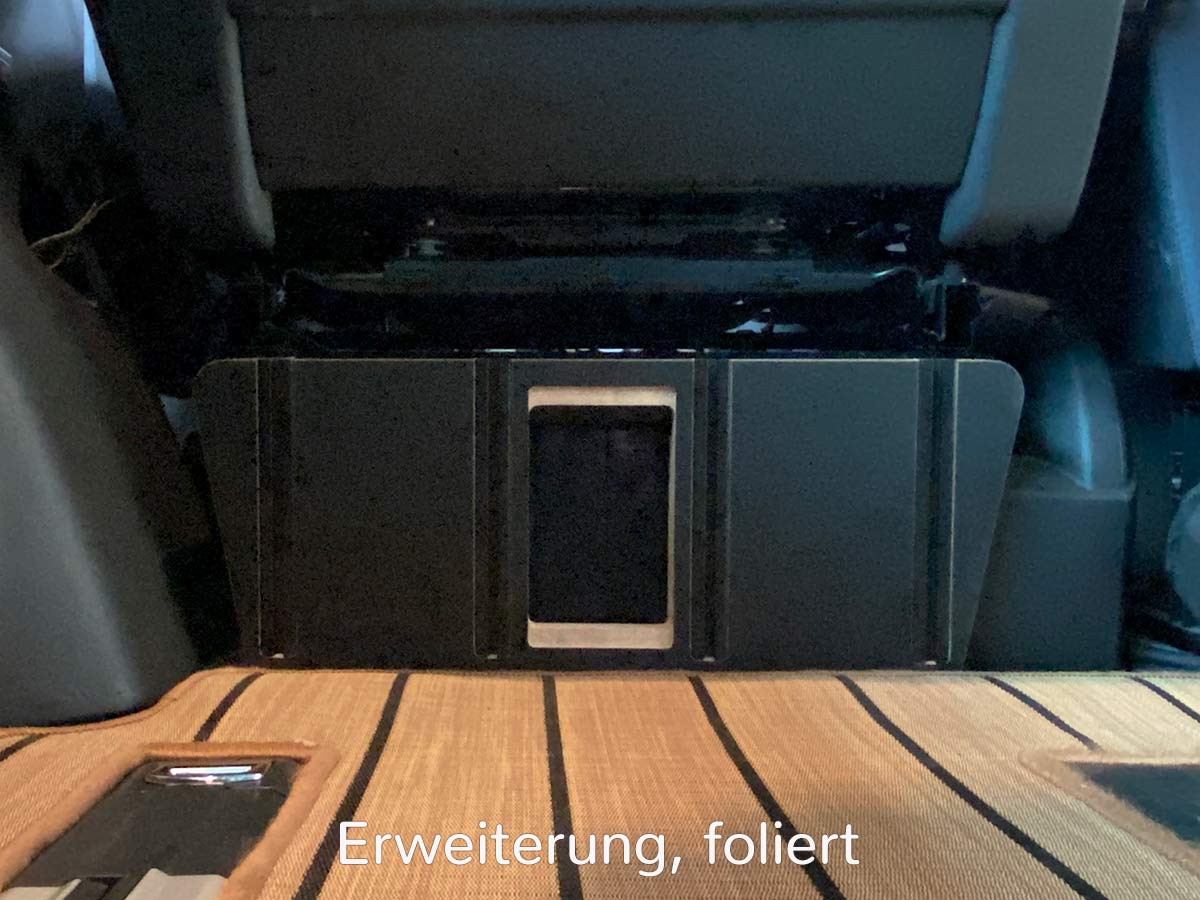
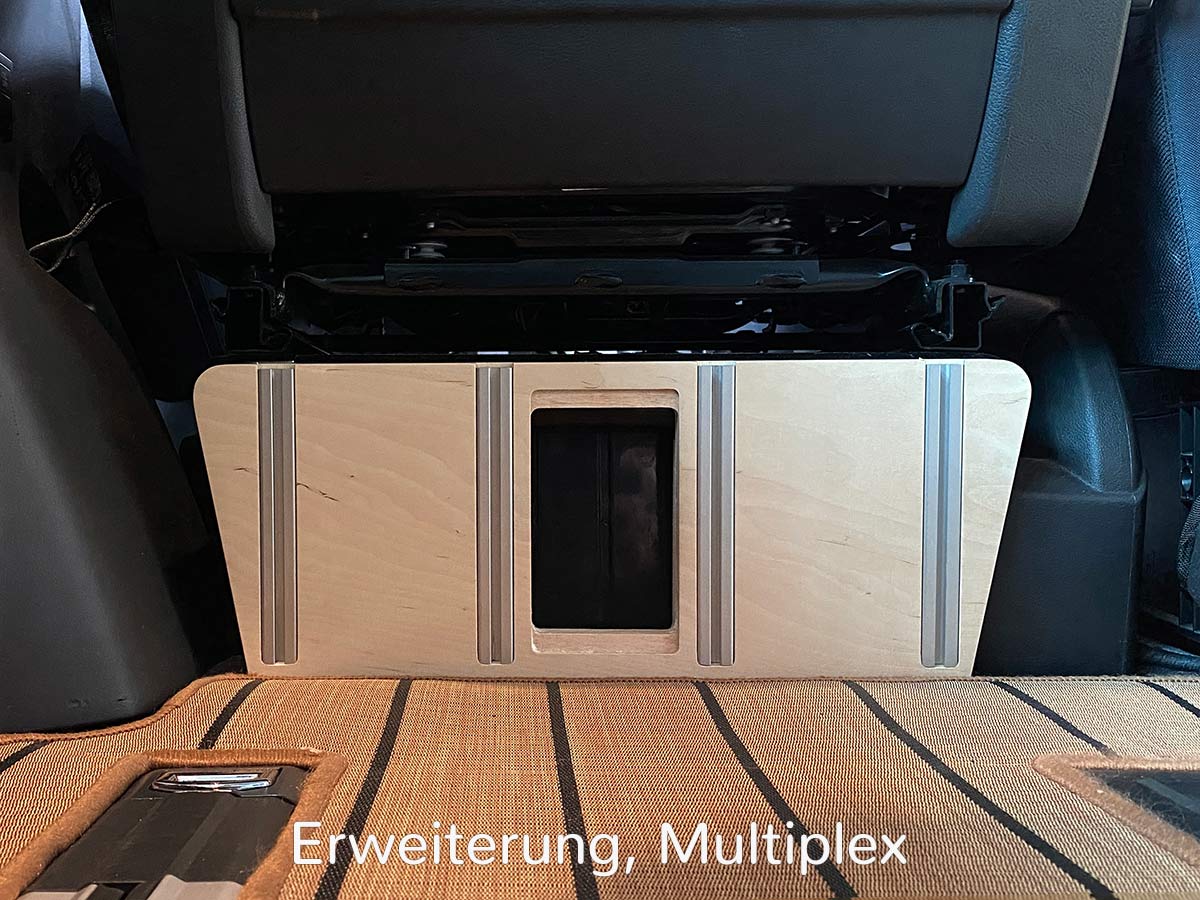
Extension for the Console Under the Driver and Passenger Seat
The VANZEIT ® custom cover replaces the unattractive factory plastic cap. Attachment is tool-free and magnetic.
Optional pull protection from the inside is available, e.g., when using a compressor or for a 230 V socket on the inverter in the console.
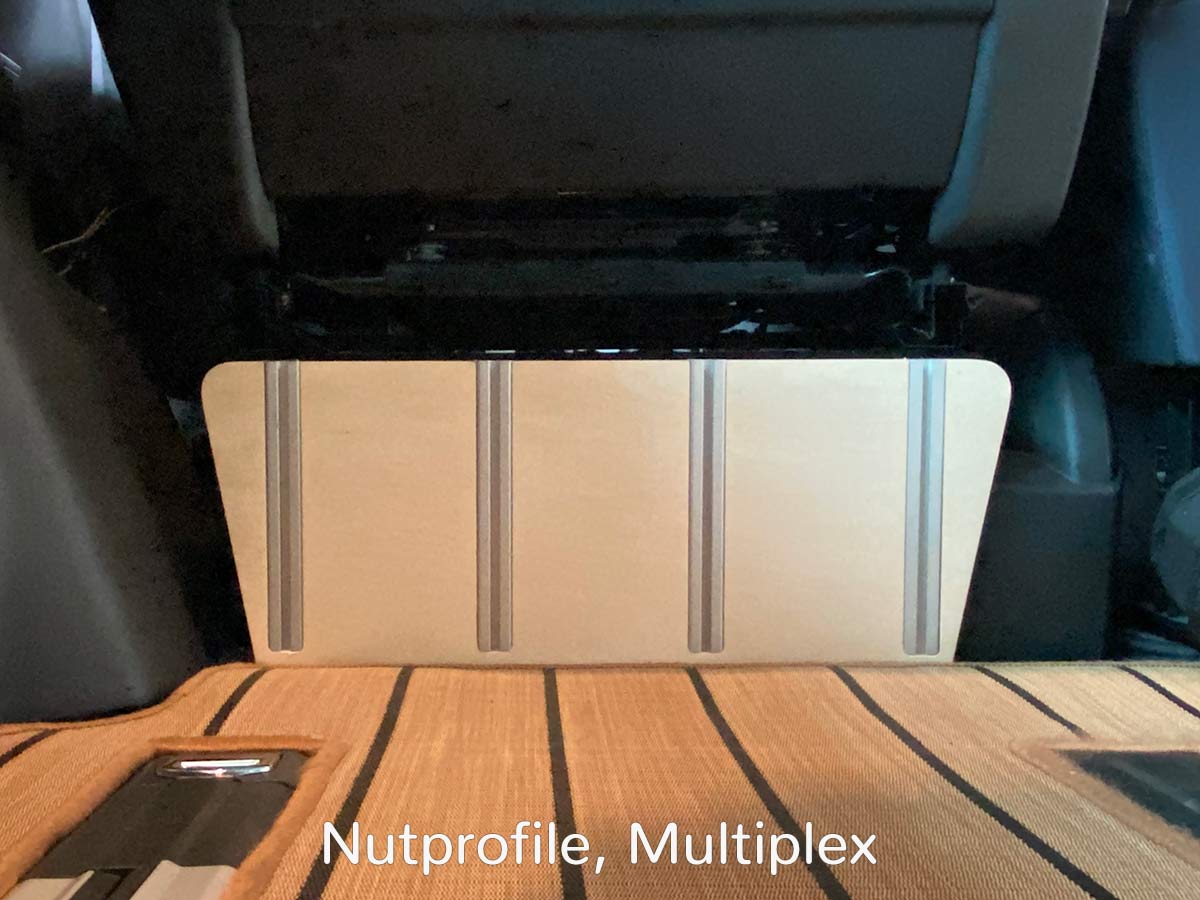
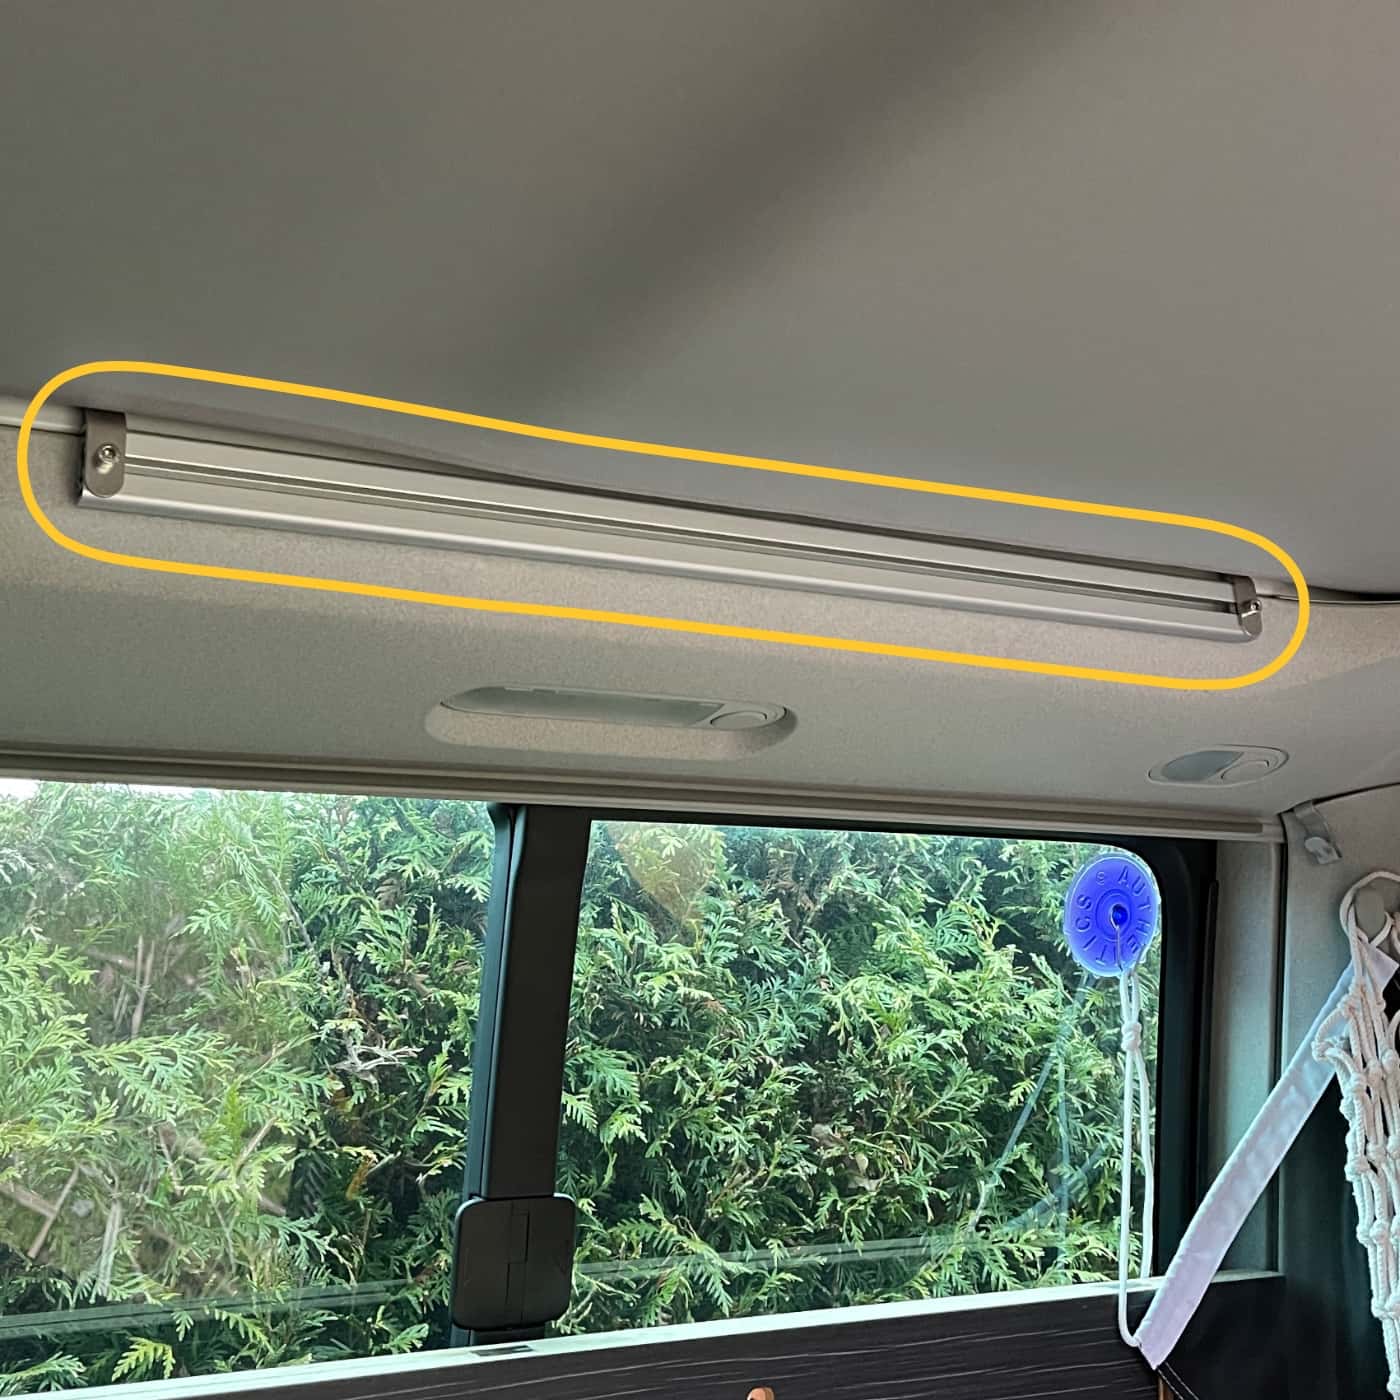
Universal Mounting System for the VW California Pop-Up Roof
Once installed, everything fits on it. We use the VANRAIL groove profile in our own shelving system for the pop-up roof and our roof cabinet for the California Beach.
You can choose freely from M3 to M6, allowing you to securely attach everything from magnetic strips and coat hooks to the IKEA Sunnersta collection – whatever you like!
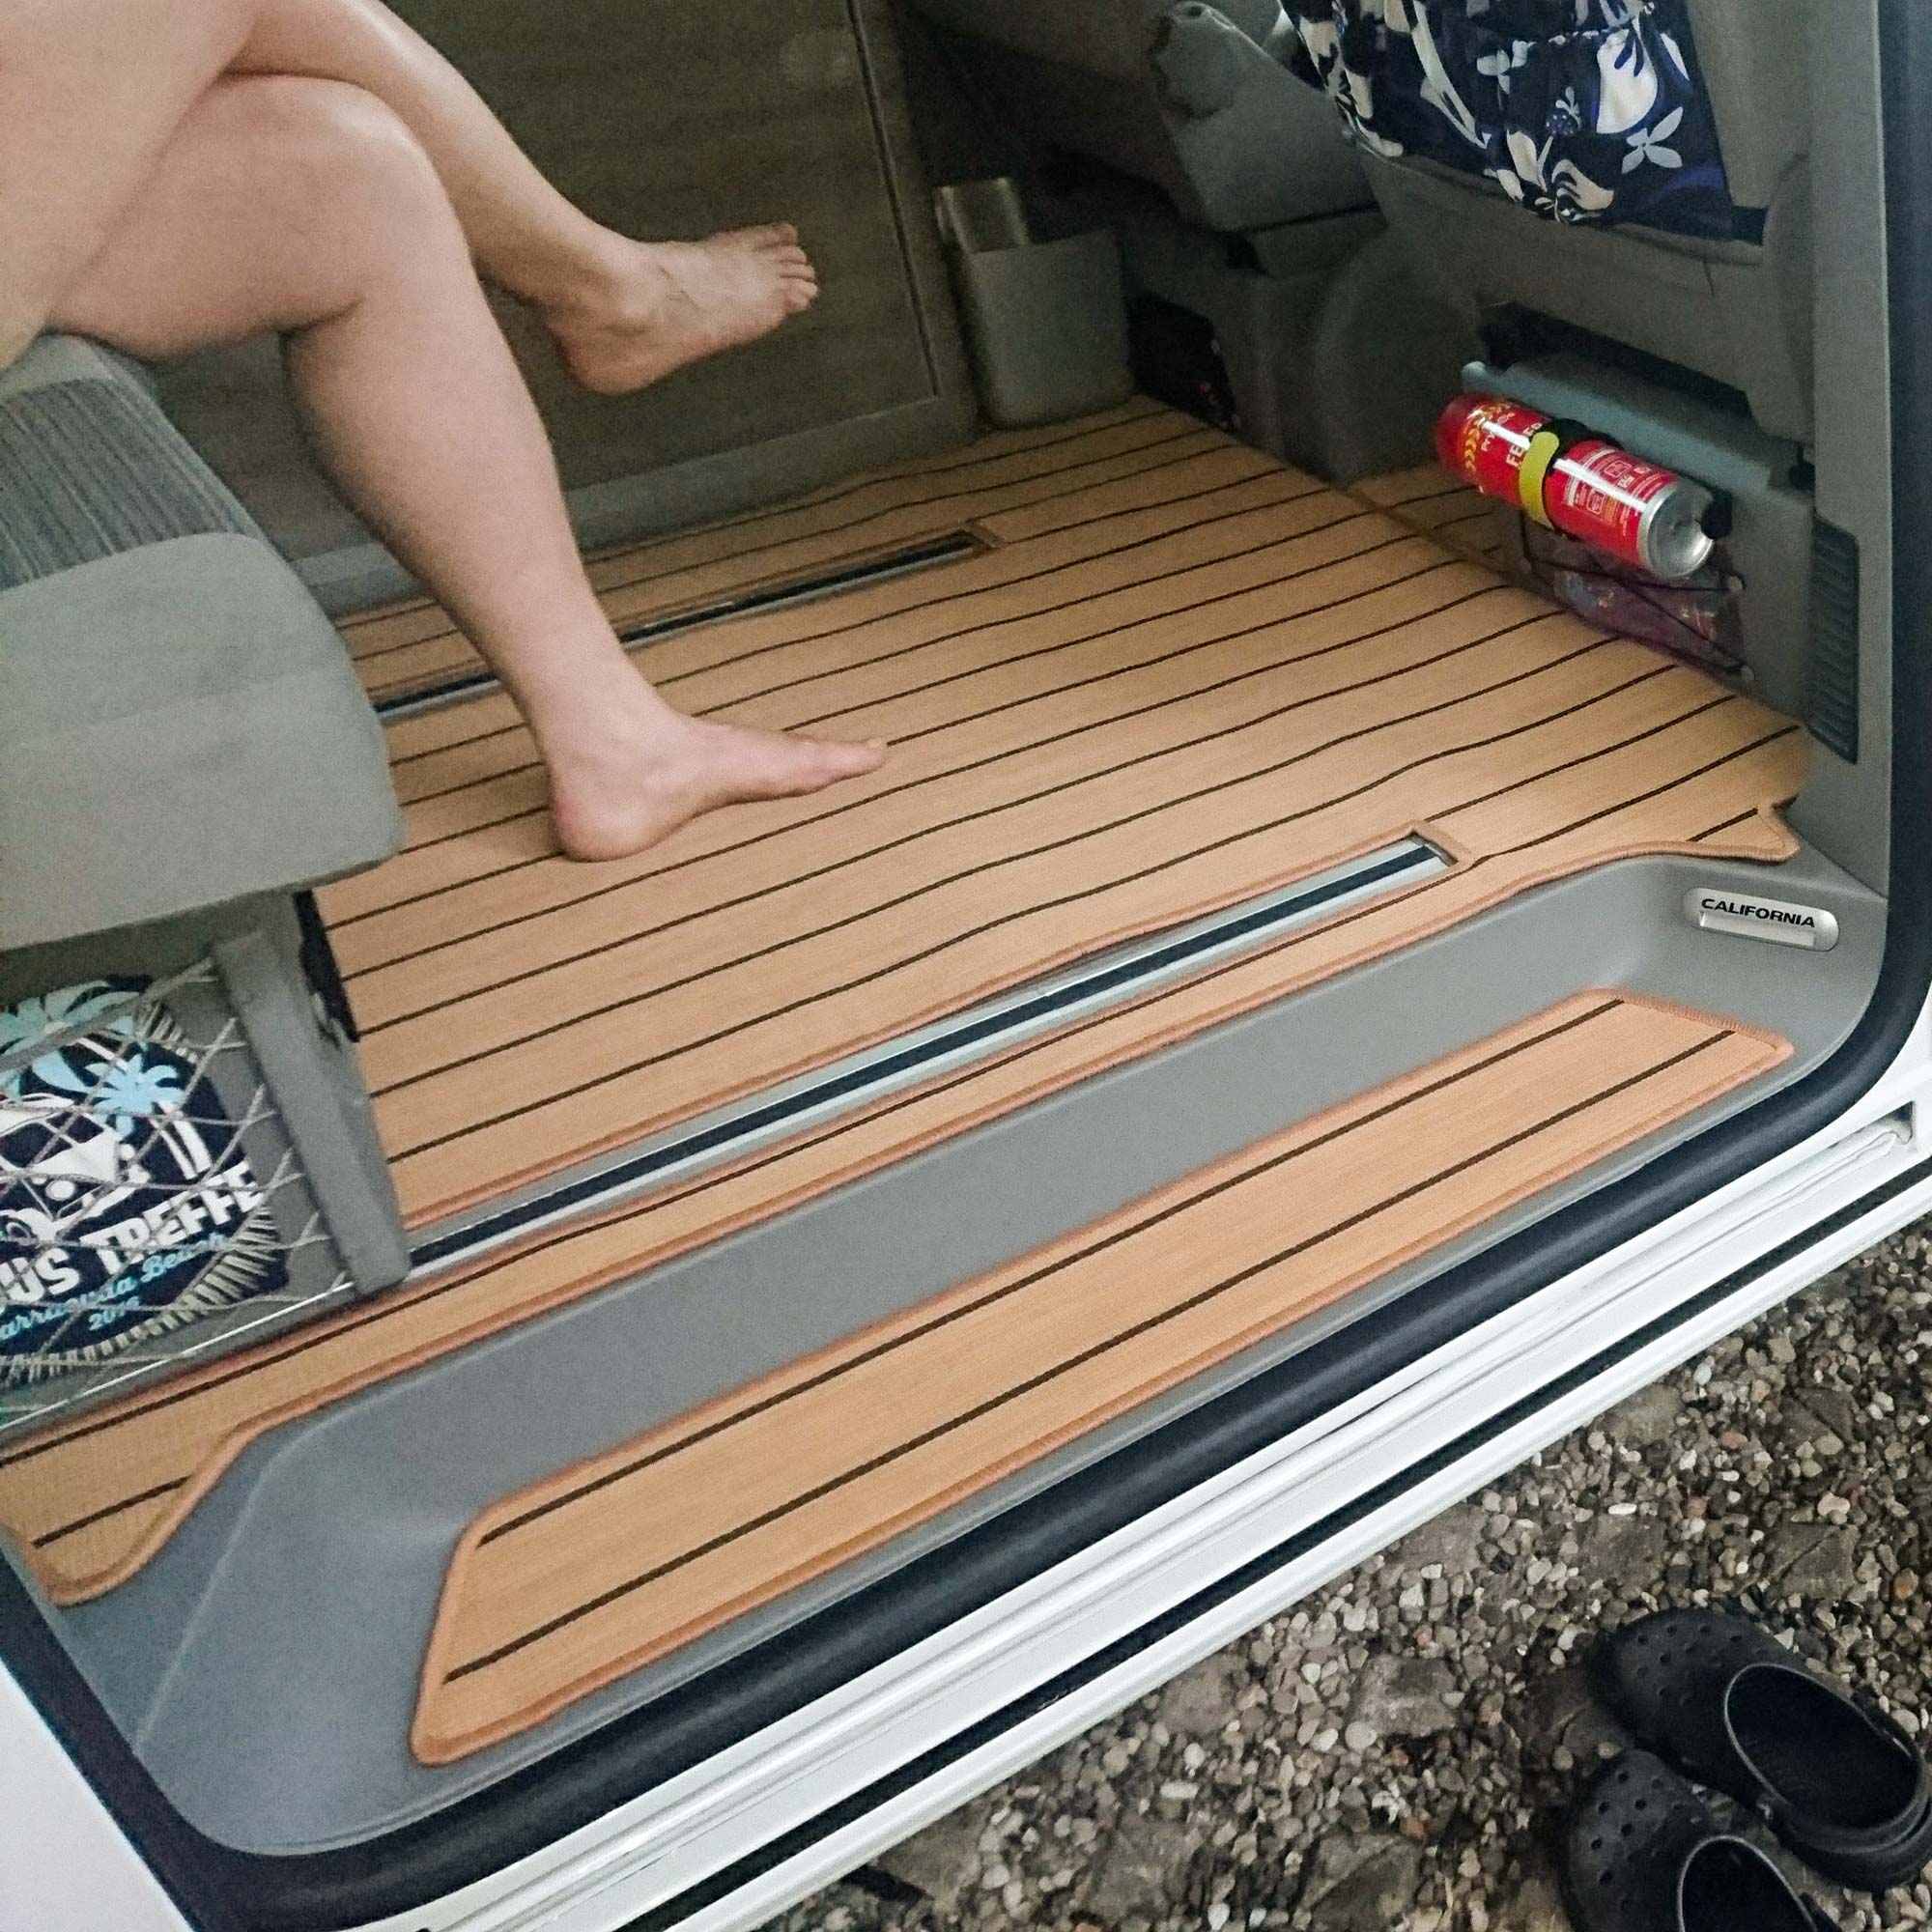
Ship Deck Living Area Mat
Warm feet, red wine-proof, and simply beautiful: Our ALLESANDECK car mat for VW California and custom-fitted for your camper.
Camper Conversion – Make your van your favorite place on wheels.
Your own camper conversion is more than just a DIY project – it is the key to your tailor-made adventure on four wheels. With many extras you can install yourself, you can turn your transporter into a comfortable home on wheels that perfectly suits your travel style.
Whether you want to transform your VW bus for weekend trips or convert it into a full-time campervan for extensive journeys – with the right knowledge and materials, your vanlife experience is guaranteed to be extraordinary!
In this guide, you’ll learn everything you need to know to successfully build your campervan yourself – from careful planning to the final execution.
The basics of camper conversion
With your own camper conversion, you can turn your transporter into a cozy home on wheels. For your project to be successful, it's essential to establish the right foundations from the start – from your first idea through to the final build. If you think beforehand about how you want your dream camper to look and familiarize yourself with the legal framework, you'll lay the foundation for great camping experiences.
Planning and conceptualizing your project
If you want to successfully convert your van, plan the whole thing carefully. That's the foundation. I recommend starting with a detailed analysis. Will you be taking weekend trips, or are you planning longer journeys? Write down what you typically need in your everyday life for the planned travel period. Tip: Start with the items you wrote down. Take them into the van and then see which are impractical on the road, or – based on other campers’ experience – consider alternative solutions before immediately buying a second household on wheels.
Create scale drawings or use 3D software to visualize your interior conversion. If you're looking for practical camper conversion ideas, you can browse specialist magazines, online forums, and social media. Set yourself a realistic budget and timeline. Especially with complex campervan projects, this helps prevent unpleasant surprises.
Also, remember weight distribution in your vehicle. The more evenly you arrange your furnishings and equipment, the safer and more fuel-efficient you'll be on the road. Tip: Usually, you can weigh your van for free at local recycling centers and easily check the weight distribution. Finally, plan enough storage space for your equipment. Tip: A full-scale cardboard mock-up lets you test many things before building.
Important legal aspects of camper conversion
To ensure everything goes smoothly later on, there are several legal requirements you should observe in your camper conversion. To register your van as a motorhome, certain minimum equipment standards are required. Tip: Compare insurance policies before deciding on the type of registration. With new vehicles, insurers typically offer different guarantees, e.g., regarding vehicle loss. Also, your choice of parking can be a deciding factor: some municipalities do not favor or even prohibit the permanent parking of motorhomes. Planning ferry trips? Ferry tariffs can also vary according to the type of vehicle registration.
The minimum requirements for motorhomes include a permanently installed seating arrangement (in addition to non-swivel driver seats), a sleeping place, and storage space beyond typical car compartments. The number of seats should match the number of sleeping places. A table and a permanently installed cooking facility complete these requirements. All interior furnishings except the table must be securely attached to the vehicle, although they can be rotatable, foldable, or sliding.
To stay on the safe side, have your gas system professionally inspected and regularly checked (every two years in Germany). To ensure good and safe electricity supply, it's essential that electrical installations are carried out by professionals. Pay close attention to your vehicle’s permissible gross weight (you can find this in your registration document (Zulassungsbescheinigung I) in line F.1, or in the vehicle registration certificate under item 15) and how the payload is distributed.
To keep your camper safe and insurable, a TÜV inspection after the conversion is advisable or mandatory if changing the registration. I recommend discussing all necessary approvals and inspections with your trusted TÜV expert in advance and letting them accompany your project.
The best vehicles for camper conversion
If you decide on your own camper conversion, there are several factors to consider. Floor space, headroom, acquisition costs, and technical condition play significant roles in ensuring a successful conversion project. They also influence your next planning steps for your motorhome conversion.
Popular panel van models compared
The VW Crafter and Mercedes Sprinter are ideally suited for extensive camper conversions thanks to their standing height and spacious layout. If you're looking for an affordable, readily available used vehicle, the Fiat Ducato and Peugeot Boxer are great options. The Ford Transit offers much to love: a great price-performance ratio and plenty of conversion possibilities.
In short: panel vans are excellent if you need plenty of space (do you?). You can fit your kitchen and even a private bathroom, and the bed can stay permanently set up.
Transporters and minibuses vs. panel vans: Pros and cons
Older models like the VW T3 or T4 are true cult favorites. However, with these campervans, expect higher maintenance costs and less space for modern conversion modules. The VW T6 is genuinely versatile! It's suitable for compact camper conversion ideas, perfect for one or two people, and offers good driving characteristics and discreet appearance in city traffic. You can easily use it as your daily vehicle, even with several passengers.
With high-roof models, you gain valuable standing height. It's often pleasant when stationary but, as we’ve found, not necessarily required. Longer wheelbases give you enough space to leave the bed permanently set up or integrate a kitchen or small shower permanently. The downside: larger vehicles consume more fuel and can be trickier to maneuver in tight city centers or on narrow mountain roads.
Step-by-step camper conversion guide
If you want the ideal camper conversion for you, it's essential to proceed systematically and follow carefully thought-out steps. After the basic planning and vehicle selection, you move on to the practical implementation of your personal dream campervan. Here, you’ll learn how to install the most important components correctly.
Insulation and thermal protection
Good insulation is essential for a successful camper conversion, especially if you plan to travel to colder or hotter regions. First, clean the van thoroughly, then glue soundproofing panels to the metal body sheets inside to reduce unpleasant vibrations. Then, you can attach insulation mats, such as "Armaflex," to the walls, ceiling, and floor.
With these materials, you'll be on the safe side because they provide excellent acoustic and thermal insulation for your motorhome conversion. To prevent unsightly thermal bridges within your cavities, pay attention to seamless installation. For optimal insulation values, you can additionally seal transitions with suitable adhesive tape. Proper execution at this critical step prevents condensation and mold formation in your van conversion.
Installing Electrics and Solar Systems
To ensure you only have the best experiences with your campervan, start here as well with a thorough analysis of your needs. If you want to find out how much electricity you consume daily, you can easily calculate this. Then, you can select the appropriate battery and solar system right away. Find tips for electrical planning for off-grid camping in the blog.
If you prefer a bit more flexibility, you can also integrate a shore power connection. To be safely equipped on the road, ensure sufficiently dimensioned cable cross-sections and components. You can find a good introduction to this topic by searching for “cable cross-section camper calculator”. Tip: Manufacturer websites such as Victron provide assistance in finding the right dimensions for charge controllers, inverters, and more.
Water Supply and Wastewater System
A well-thought-out water system makes your campervan adventures even more comfortable. If you wish to install a fresh water tank, it’s a good idea to select a frost-proof spot inside your van. From there, you can easily connect it using a submersible pump. For interior installation, flexible water pipes with quick connectors are very convenient to install. For your wastewater system, a hose leads to a grey water tank (from 10 liters upward), which can be mounted under your vehicle.
Plan sufficient ventilation to the outside for wastewater and toilet use. This prevents unpleasant odors.
Interior Construction and Space Optimization
To feel as comfortable on the road as you do at home, it's essential that your camper’s interior is done properly. When you optimize your space cleverly, you can utilize every centimeter and create a cozy atmosphere simultaneously. This ensures you’ll enjoy your camper even on longer holiday trips.
Furniture Construction and Material Selection
If you're building your camper fittings yourself, choosing the right materials is also important. This helps you improve the weight, durability, and appearance of your furniture. Lightweight, flexible plywood sheets (9–12 mm) are excellent for cabinets and paneling, while multiplex plywood is great for load-bearing elements. Moisture-resistant materials like laminated plywood or bamboo boards are ideal for kitchen countertops. Avoid heavy MDF boards, as they tend to swell with moisture.
If you opt for building your campervan's interior yourself, you can also consider modular systems. These are very practical because they can be adjusted flexibly or even replaced later. If you’re building your own furniture, ensure the corners are rounded and choose secure latches for doors and drawers to keep everything safe during travel.
Cool Tip 1: With cool boxes, you don’t immediately lose all the cold air when lifting the lid.
Cool Tip 2: If you're choosing a fridge, make sure the hinges open against the driving direction. This way, it won’t empty itself automatically when braking.
Space-saving Solutions for Smaller Campers
In compact campers such as the VW T6, it’s particularly important to use space multifunctionally. With a few smart ideas, your motorhome will become a truly comfortable place: beds that serve as seating areas during the day, extendable tables, or kitchen units with sliding components – allowing you to save space and still use everything conveniently.
Overhead cabinets, ceiling shelves, and under-bed drawers will give you plenty of additional storage space. Solutions such as fold-out work surfaces or tables that can be used both indoors and outdoors allow you to maximize usable space even further.
When building your camper, the principle “less is more” is good guidance … or, as Antoine de Saint-Exupéry wrote: “Perfection is achieved not when there is nothing more to add, but when there is nothing left to take away.” That’s one of my favorite quotes, by the way.
Budget and Costs for Camper Conversion
Keep an eye on the financial aspects of your camper conversion to know how extensive your project can or should become. The total costs of a DIY conversion can range from a few hundred euros (if you repurpose second-hand furniture or are happy with just a mattress, water, and a stove) to several thousand euros, depending on the standard you aim for. This, of course, depends on your demands and the amenities you desire. There's always room for more ;)
Money-saving Tips and Alternatives
During camper conversion, you can save plenty of money with a few smart tricks. If you're looking for used parts, check online marketplaces or salvage yards. Here, you'll find items like windows, seats, or furniture at reduced prices.
If you build your campervan interior using individual furniture pieces yourself, you can save a lot. The cost of self-built cabinets is often only one-third of that for ready-made camper furniture. Visit clearance sales at carpentry workshops to buy affordable wooden boards, and consider multifunctional furniture elements. Popular streaming platforms are full of ideas for these.
For interior building, simple materials such as pine wood offer an affordable alternative to costly special panels, which I've experienced as neither sufficiently sturdy for screwing nor particularly resistant to warping. Experienced carpenters rightly enjoy greater trust compared to affiliates.
Tools for Camper Conversion
To ensure your camper conversion succeeds, you'll need a selection of tools and materials perfectly suited to your project. The right equipment saves time, avoids frustration, and allows you to achieve professional results when converting your campervan. For choosing suitable woodworking tools, I recommend Jonas Winkler’s YouTube channel, which offers reasonably priced – not cheap – tips on this topic.
Essential Tools for Your DIY Camper Conversion
To successfully complete your campervan conversion, it's crucial to have a comprehensive toolkit on hand. These tools are indispensable for me:
- Cordless screwdriver with at least two batteries: A reliable helper for all assembly tasks during interior construction and definitely a household must-have anyway.
- Jigsaw for cut-outs and simple rounded corners; a plunge circular saw with guide rail allows you to precisely cut your camper furniture.
- Delta sander for smooth surfaces and optimal edges. Patience is your middle name? Sandpaper and a wooden block will suffice too.
- One-handed clamps: These hold your workpieces securely in place while you work. You’ll never have too many, and they’re always too short anyway… ;)
- Multimeter: An essential item for all electrical installations in your camper and also helpful on the road.
- Tape measure: Go for at least a 5-meter one. In the van and when furnishing it, you’ll frequently need more than the typical 2 meters offered by folding rulers.
- Dust protection mask and extraction system: Do yourself and your health a favor—get a proper shop vacuum and a dust mask with replaceable filters. The fine dust produced during cutting and sanding quickly dries out your mucous membranes and can quickly cause long-term discomfort.
Tip: No table handy or you don’t like using one for cutting tasks? Use two simple sawhorses and one or more wooden boards. Together with your clamps, this makes a great makeshift workbench.
Investing in quality tools pays off during complex conversions and makes future adjustments and repairs easier. If expensive tools (such as routers or table saws) are unlikely to see further use beyond your conversion, you can rent them or use them under supervision in a makerspace.
Professional Assistance vs. DIY Conversion
If you choose to do your camper conversion yourself, you can give your creativity free rein and design every inch exactly as you wish. You decide on the materials, schedule, and budget. However, many DIY converters quickly reach their limits (me included) with complex technical installations like electrical systems. Mistakes here are not only annoying but can also be dangerous.
Experts have extensive experience with various vehicle types and know exactly how to professionally tackle campervan conversion challenges. The quality of professionally finished modules and systems is usually higher than DIY projects. But obviously, this comes at a cost. A professional won't do it cheaper than you could on your own.
A popular compromise is the partial campervan conversion:
You take on straightforward tasks, like furniture construction yourself, while leaving critical components such as gas and electrical installations to specialists. This hybrid method allows you to combine your personal touch with technical safety.
If you prefer, you can also supplement your camper by purchasing ready-made conversion accessories. Especially popular are customizable interior kits that you can modify according to your preferences.
Conclusion
A camper conversion is a project through which you can create your very own personal mobile home, exactly as you envision. If you have enough time and patience, plan everything thoroughly, select the right materials, and have some manual skills, you can make your individualized vanlife dream come true. Whether you opt for a complete DIY build, outsource technical tasks, or work with pre-manufactured modules, you'll certainly end up building your personal travel companion.
Consider ready-to-use solutions and multifunctional furniture too. These optimally use limited space and are based on many years and miles of camper experience.
A self-build might be a small challenge, but the result is worth it. You’ll have a customized camper perfectly tailored to you, enabling unforgettable adventures.
Here you’ll find the most frequently asked questions and answers on this topic.
How much does it cost to convert a campervan yourself?
Depending on your preferences for materials, the costs of a DIY campervan conversion vary from a few hundred euros to several thousand. You can significantly reduce costs by purchasing used parts from online marketplaces or scrap yards, and by choosing inexpensive materials such as simple pine wood instead of expensive specialty panels. Another good way to save money is using ready-made individual modules that you can customize yourself.
Which vehicle is best suited for a camper conversion?
The choice depends on various factors like floor area, standing height, your budget, and desired vehicle condition. Among the most popular models are the VW Crafter and the Mercedes Sprinter. However, the Fiat Ducato and Renault Master also make excellent, and significantly more affordable, alternatives. The VW T6 is ideal for compact conversion ideas, while panel vans offer more space for extensive interior conversions, though they're less flexible for everyday use.
What legal aspects do I need to consider for a camper conversion?
If you want to register your converted vehicle as a motorhome, you must have it approved by TÜV. It’s best to discuss your plans with them in advance to avoid surprises later. Document your conversion and installations step by step, as this makes the technical inspection easier.
Should I convert my camper myself or seek professional help?
A DIY conversion offers creative freedom and a personal touch, but it can be challenging for complex technical installations. Choosing a professional conversion gives you expert craftsmanship, saves time, and generally results in higher quality, although at greater expense.
A popular compromise is a partial conversion, in which you do simpler tasks yourself and leave critical components such as the camper electrics to professionals. This way, you perfectly combine your personal style with technical safety.
What tools do I need for a camper conversion?
To ensure long-term satisfaction with your results, having the right tools is essential. Good quality tools make work easier and results more accurate. You can find several tool recommendations above. Expensive equipment can also be rented or used in supervised self-help workshops.
How do I plan the electrical system in my campervan?
Start by conducting a thorough needs analysis to properly size your electrical system. If you're uncertain about quickly complex systems, it's a good idea to consult an electrician who specializes in camping vehicles.
How can I best optimize the space in my camper?
If you want to cleverly utilize every centimeter, plan the interior layout based on your personal travel requirements. With 3D planning software, you can easily visualize different layouts in advance. Even simpler: Mark your vehicle's floor plan on the floor with masking tape and use cardboard boxes glued together with a hot glue gun to simulate your furnishings. This allows you to quickly and cost-effectively evaluate various layouts. Optimize space using multifunctional furniture like seating and sleeping areas that double as a table or kitchen, and folding tables. Also think vertically: overhead cabinets and shelves provide additional storage space in otherwise unused areas. Test these cardboard mock-ups in your actual vehicle to avoid unnecessary bumps to the head ;)
All products are self-developed, personally used by us, and 100% practical.
Since 2016, our bus essentials are locally manufactured in Northern Germany. You can count on it 🤝

